参考了香港胖仔的博客,自己加入了一些简单的东西。作为本学期的flutter大作业。 这个app相当简单只有五个界面。 首先是欢迎界面 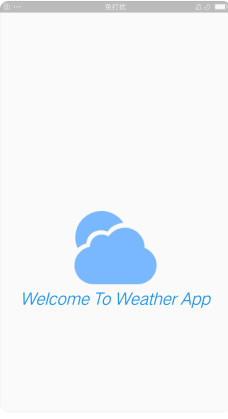
void main() {
  runApp(MyApp());
}

class MyApp extends StatefulWidget{
  @override
  State<StatefulWidget> createState() {
    return _MyApp();
  }
}

class _MyApp extends State<MyApp>{
  @override
  Widget build(BuildContext context) {
    // TODO: implement build
    return MaterialApp(
        debugShowCheckedModeBanner: false,
        title: "天气app",
       //theme: ThemeData.dark(),
        home: WelcomePage()
    );
  }

}
class WelcomePage extends StatefulWidget{
  @override
  State<StatefulWidget> createState() {
    // TODO: implement createState
    return _WelcomePage();
  }
}

class _WelcomePage extends State<WelcomePage>{
  @override
  Widget build(BuildContext context) {
    void getLocationData() async {
      var weatherData = await WeatherModel().getLocationWeather();
      Navigator.pushAndRemoveUntil(context, MaterialPageRoute(builder: (context){
        return AppHome(
          locationWeather: weatherData,
        );
      }), (route) => false);
    }

    // TODO: implement build
    Future.delayed(Duration(seconds: 2),(){
      getLocationData();
    });
    return Scaffold(
      body: Container(
          alignment: Alignment.center,
          child: Column(
            children: <Widget>[
              Expanded(
                  flex: 1,
                  child: Text("")),
              Expanded(
                  flex: 1,
                  child: Column(
                    children: [
                      Image(image: AssetImage("assets/images/welcome.png")),
                      Text("Welcome To Weather App",style: TextStyle(fontSize: 26,color: Colors.blue,fontStyle: FontStyle.italic))
                    ],
                  )),
            ],
          )
      ),
    );
  }

}
加载欢迎页面两秒后,调用聚合数据的api请求天气数据。
请求网络之前自定义一个工具类
class NetworkHelper{
  NetworkHelper(this.url);
  final String url;
  Future getData() async{
    try{
      http.Response response = await http.get(url);
      if(response.statusCode==200){
        String data = response.body;
        return jsonDecode(data);
      }else{
        print(response.statusCode);
        return;
      }
    } catch(e){
      return "empty";
    }
  }
}
接口类
// const apiKey = 'a1229a6169b9ca8fa751980e7917fae5';
const openWeatherMapURL = 'http://v.juhe.cn/weather/geo';
const openCityWeatherMapURL = 'http://v.juhe.cn/weather/index';
class WeatherModel {
  //http://v.juhe.cn/weather/index?format=2&cityname=%E8%8B%8F%E5%B7%9E&key=您申请的KEY
  Future<dynamic> getCityWeather(String cityName) async{
    NetworkHelper networkHelper = NetworkHelper('$openCityWeatherMapURL?format=1&key=$apiKey&cityname=$cityName&dtype=json');
    var weatherData =await networkHelper.getData();
    return weatherData;
  }

  Future<dynamic> getLocationWeather() async{
    Location location = Location();
    await location.getCurrentLocation();
    NetworkHelper networkHelper = NetworkHelper(
        '$openWeatherMapURL?format=2&key=$apiKey&dtype=json&lat=${location.latitude}&lon=${location.longitude}');
    var weatherData = await networkHelper.getData();
    return weatherData;
  }

  String getMessage(int temp) {
    if (temp > 25) {
      return '好热,现在适合吃冰淇淋!';
    } else if (temp > 20) {
      return '适合穿短袖T恤 ';
    } else if (temp <= 10) {
      return '好冷,戴上围巾和手套吧';
    } else {
      return '温度宜人,开心玩耍吧';
    }
  }
}
getMessage方法是设置之后界面的一些文本丰富界面。 这里说到两种请求聚合api的方式,一种是通过所处地理位置的经纬度。 获取经纬度的方式。
class Location{
  double latitude;
  double longitude;
  Future<void> getCurrentLocation() async{
    try{
      Position position = await Geolocator().getCurrentPosition(desiredAccuracy: LocationAccuracy.low);
      latitude = position.latitude.abs();
      longitude = position.longitude.abs();
    }catch(e){
      print(e);
    }
  }
}
还有一种就是通过城市的名称。
请求的返回结果有多种情况: 1.手机没有网络的情况,会抛出一个没有网络异常,自定义返回一个字符串,方便之后的判断。 2.有网络,请求失败。 3.有网络请求成功。
最后无论是通过聚合接口还是我们自己自定义的,请求网络之后都会有一个返回值,通过不同的返回值来处理相关的逻辑。
拿到返回值后,就把返回值(无论成功与否)通过欢迎界面,传递给主界面。 主界面导航
class AppHome extends StatefulWidget {
  AppHome({this.locationWeather});
  final locationWeather;
  @override
  State<StatefulWidget> createState() {
    // TODO: implement createState
    return _HomePageState();
  }
}

class _HomePageState extends State<AppHome>{

  int _currentIndex=0;
  List<Widget> _widgets=List();
  @override
  void initState() {
    super.initState();
    _widgets.add(LocationScreen(locationWeather: widget.locationWeather,));
    _widgets.add(NewsPage());
    _widgets.add(MyPage());
  }

  @override
  Widget build(BuildContext context) {
    // TODO: implement build
    return Scaffold(
      body: IndexedStack(
        index: _currentIndex,
        children: _widgets,
      ),
      bottomNavigationBar: BottomNavigationBar(
        items: const <BottomNavigationBarItem>[
          BottomNavigationBarItem(
            icon: Icon(Icons.wb_sunny),title: Text("今日天气")
          ),
          BottomNavigationBarItem(
              icon: Icon(Icons.library_books),title: Text("今日目标")
          ),
          BottomNavigationBarItem(
              icon: Icon(Icons.person),title: Text("关于我的")
          )
        ],
        currentIndex: _currentIndex,
        onTap: _itemTapped,
      ),
    );
  }
  void _itemTapped (int index){
    setState(() {
      _currentIndex=index;
    });
  }
}
一些简单的写法,不必多言。
在主界面添加子页面的时候,在把从欢迎页面请求的数据,通过主页面传递给天气页面。

class LocationScreen extends StatefulWidget {

  LocationScreen({this.locationWeather});
  final locationWeather;
  @override
  _LocationScreenState createState() => _LocationScreenState();

}
class _LocationScreenState extends State<LocationScreen> {

  WeatherModel weather = WeatherModel();
  String temperature;
  String condition;
  String cityName;
  String imgId="assets/images/init.JPG";
  String weatherMessage;

  @override
  void initState() {
    super.initState();
    updateUI(widget.locationWeather);
  }

  Future<void> updateUI(dynamic weatherData) async {
    SharedPreferences prefs=await SharedPreferences.getInstance();
    prefs.setString('temperature', "∅");
    prefs.setString('condition', "未知");
    prefs.setString('weatherMessage', "没有查到天气");
    prefs.setString('cityName', '绵阳');
    prefs.setString('imgId', 'assets/images/init.JPG');
    setState(()  {
      if(weatherData=="empty"||weatherData['result']==null){
        temperature = prefs.get('temperature');
        condition = prefs.get('condition');
        weatherMessage = prefs.get('weatherMessage');
        cityName = prefs.get('cityName');
        imgId=prefs.get('imgId');
      }
      else {
        var result = weatherData['result'];
        var sk = result['sk'];
        var today = result['today'];
        temperature = sk['temp'];
        cityName = weatherData['result']['today']['city'];
        condition = today['weather'];
        weatherMessage = weather.getMessage(int.parse(temperature));
        if(condition.contains("雨")){
          imgId="assets/images/rain.jpg";
        }else if(condition.contains("晴")){
          imgId="assets/images/qing.png";
        } else if(condition.contains("多云")){
          imgId="assets/images/duoyun.png";
        }
      }

    });
  }

  @override
  Widget build(BuildContext context) {
    return Scaffold(
      appBar: AppBar(
        leading: Icon(Icons.wb_sunny,color: Colors.white,),
        title: Text("今日天气"),
        backgroundColor: Color(0xff343434),
      ),
      body: Container(
        decoration: BoxDecoration(
          image: DecorationImage(
            image: AssetImage(imgId==null?'assets/images/init.JPG':imgId),
            fit: BoxFit.cover,
          ),
        ),
        //constraints: BoxConstraints.expand(),
        child: Column(
          mainAxisAlignment: MainAxisAlignment.spaceBetween,
          crossAxisAlignment: CrossAxisAlignment.stretch,
          children: <Widget>[
            Row(
              mainAxisAlignment: MainAxisAlignment.spaceBetween,
              children: <Widget>[
                FlatButton(
                  onPressed: () async {
                    var weatherData = await weather.getLocationWeather();
                    updateUI(weatherData);
                  },
                  child: Icon(
                    Icons.near_me,
                    color: Colors.white,
                    size: 50.0,
                  ),
                ),
                FlatButton(
                  onPressed: () async{
                    var typedName =await Navigator.push(
                      context,
                      MaterialPageRoute(
                        builder: (context) {
                          return CityScreen();
                        },
                      ),
                    );
                    if(typedName!=null){
                      var weatherData = await weather.getCityWeather(typedName);
                      updateUI(weatherData);
                    }
                  },
                  child: Icon(
                    Icons.location_city,
                    color: Colors.white,
                    size: 50.0,
                  ),
                ),
              ],
            ),
            Padding(
              padding: EdgeInsets.only(left: 15.0),
              child: Row(
                children: <Widget>[
                  Text(
                    '$temperature°',
                    style: kTempTextStyle,
                  ),
                  Text(
                    condition,
                    style: kConditionTextStyle,
                  ),
                ],
              ),
            ),
            Padding(
              padding: EdgeInsets.only(right: 15.0),
              child: Text(
                '$weatherMessage in $cityName',
                textAlign: TextAlign.right,
                style: kMessageTextStyle,
              ),
            ),
          ],
        ),
      ),
    );
  }
}
再说回之前请求的情况,如果是没有网络则捕获异常返回“empty”,如果有网络但请求失败,返回的数据中的result==null(试出来的) 通过以上代码,可以看出来,我把这两种情况放在一起,当条件满足时,加载SharedPreferences 存储好的数据(其实没必要用,我用是为了完成老师的打分点)。 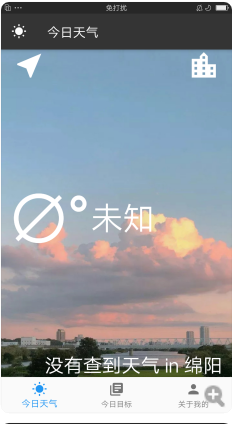
然后就是请求成功的情况,解析相应的json串,更新ui。通过返回的不同的天气状况,温度,设置不同的背景图片,通过getMessage()提示不同的语句。
右上角的按钮是进入城市选择界面
class CityScreen extends StatefulWidget {
  @override
  _CityScreenState createState() => _CityScreenState();
}

class _CityScreenState extends State<CityScreen> {
  String cityName;
  @override
  Widget build(BuildContext context) {
    return Scaffold(
      resizeToAvoidBottomInset: false,
      appBar: AppBar(title: Text("选择城市"), backgroundColor: Color(0xff343434),),
      body: Container(
        decoration: BoxDecoration(
          image: DecorationImage(
            image: AssetImage("assets/images/city_bac.jpg"),
            fit: BoxFit.cover,
          ),
        ),
        constraints: BoxConstraints.expand(),
          child: Column(
            children: <Widget>[
              Container(
                padding: EdgeInsets.all(20.0),
                child: TextField(
                  style: TextStyle(
                    color: Colors.black,
                  ), //TextStyle
                  decoration: kTextFieldInputDecoration,
                  onChanged: (value){
                    cityName = value;
                  },
                ),
              ),
              FlatButton(
                onPressed: () {
                  Navigator.pop(context,cityName);
                },
                child: Text(
                  'Get Weather',
                  style: kButtonTextStyle,
                ),
              ),
            ],
          ),
      ),
    );
  }
}
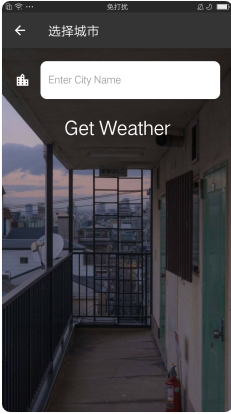 输入城市就可以查到相应城市的天气 左上角的按钮则是定位到当前位置,获取当前位置的天气。
为了完成老师的考核点,设置第二个界面设定目标界面,其实很简单。就是添加了一个文本框,点击按钮,将文本框的内容添加到下方的列表视图中,并保存到数据库中。
class NewsPage extends StatefulWidget{
  @override
  State<StatefulWidget> createState() {
    // TODO: implement createState
    return _NewsPage();
  }
}
class MyListView extends StatelessWidget {
  String title;
  MyListView(this.title);
  @override
  Widget build(BuildContext context) {
    return Container(
        child: Column(
          children: <Widget>[
            Container(
              height: 53,
              child: _mineItem(title),
            ),
            Container(
              color: Color(0xffeaeaea),
              constraints: BoxConstraints.expand(height: 1.0),
            ),
          ],
        )
    );
  }

  Widget _mineItem(String title) {
    return InkWell(
      onTap: (){

      },
      child: Row(
        children: <Widget>[
          Expanded(
            flex: 1,
            child: Container(
                padding: EdgeInsets.only(left: 16),
                child: Icon(Icons.access_time)
            ),
          ),
          Expanded(
            flex: 6,
            child: Container(
              padding: EdgeInsets.only(left: 10),
              child: Text(
                title,
                style: TextStyle(fontSize: 16),
              ),
            ),
          ),
          Expanded(
            flex: 1,
            child: Container(
              child: Icon(
                Icons.brightness_5,
                size: 20,
                color: Colors.grey,
              ),
            ),
          )
        ],
      ),
    );
  }
}
class _NewsPage extends State<NewsPage> {
   String goal;
   List widgets=[];

   @override
  void initState() {
     super.initState();
     DatabaseHelper.instance.queryAllRows().then((value) {
       setState(() {
         value.forEach((element) {
           widgets.add(element['goalText']);
         });
       });
     }).catchError((onError){
       print(onError);
     });
  }

  @override
  Widget build(BuildContext context) {
    // TODO: implement build
    return Scaffold(
      appBar: AppBar(
        backgroundColor: Color(0xff343434),
        leading: Icon(Icons.library_books,color: Colors.white,),
        title: Text("今日目标"),),
      body:Column(
        children: [
          Container(
            padding: EdgeInsets.all(20.0),
            child: new TextField(
              style: TextStyle(
                color: Colors.black,
              ), //TextStyle
              decoration: InputDecoration(
                filled: true,
                fillColor: Colors.white,
                icon: Icon(
                  Icons.location_city,
                  color: Colors.black,
                ), //Icon
                hintText: '输入今天的目标吧!',
                hintStyle: TextStyle(
                  color: Colors.grey,
                ), //TextStyle
                border: OutlineInputBorder(
                  borderRadius: BorderRadius.all(
                    Radius.circular(10.0),
                  ),
                  borderSide: BorderSide.none,
                ),
              ),
              onChanged: (value){
                 goal=value;
              },
            ),
          ),
          FlatButton(
             color: Colors.black,
            onPressed: () {
              setState(() {
                if(goal!=""){
                  widgets.add(goal);
                  DatabaseHelper.instance.insert(new Goal(goalText: goal));
                }
              });
            },
            child: Text(
              '设定目标!',
              style: TextStyle(
                fontSize: 15,
                  fontStyle: FontStyle.italic,
                color: Colors.white
              ),
              //style: kButtonTextStyle,
            ),
          ),
          Expanded(
                child:new ListView.builder(
                  itemCount: widgets.length,
                  itemBuilder:(context,index){
                    // return ListTile(
                    //   leading: new Icon(Icons.access_time),
                    //   title: Text('${widgets[index]}'),
                    // );
                    return new MyListView(widgets[index]);
                  },
                ),
              )
        ],
      ),
    );
  }
}
自定义了列表项,没什么用,就是丰富一下加个图标。 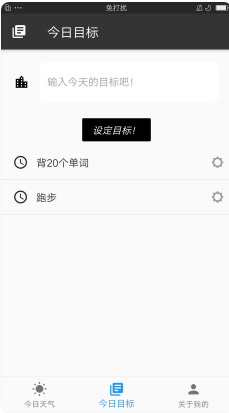 数据库部分也很简单直接贴代码就ok了。
class Goal {
  int id;
  String goalText;
  Goal({ this .id,this .goalText});
  Map<String, dynamic> toMap() {
    return { 'id':id,'goalText': goalText};
  }
}
  class DatabaseHelper {
   static final _databaseName = "myDB.db" ;
   static final _databaseVersion = 1 ;
   static final table = 'goal' ;
   static final columnId = 'id' ;
   static final columnTitle = 'goalText' ;
   DatabaseHelper.init();
   static final DatabaseHelper instance = DatabaseHelper.init();
   static Database _database;
   Future<Database> get database async {
   if (_database != null ) return _database;
   _database = await _initDatabase();
   return _database;
   }
   _initDatabase() async {
   String path = join(await getDatabasesPath(), _databaseName);
   return await openDatabase(path,
   version: _databaseVersion, onCreate: _onCreate);
   }
   Future _onCreate(Database db, int version) async {
     await db.execute('' 'CREATE TABLE $table ($columnId INTEGER PRIMARY KEY AUTOINCREMENT,$columnTitle TEXT NOT NULL)'' ');
}
   Future<int> insert(Goal goal) async {
      Database db = await instance.database;
      var res = await db.insert(table,goal.toMap());
      String str=goal.goalText;
      print("add $str");
      return res;
   }
      Future<List<Map<String, dynamic>>> queryAllRows() async {
      Database db = await instance.database;
      var res = await db.query(table);
      return res;
   }
}
最后就是关于页面,实在不知道些什么就,很简单写了一些简单的介绍,就是一些文本内容不作过多介绍。 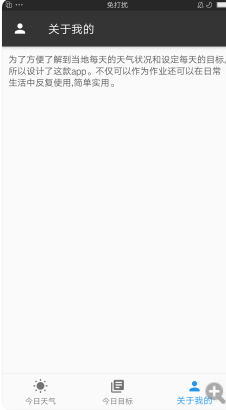 为了使界面代码清晰,将一些格式封装了起来。
const kTempTextStyle = TextStyle(
  color: Colors.white,
  fontSize: 100.0,
);

const kMessageTextStyle = TextStyle(
  color: Colors.white,
  fontSize: 30.0,
);

const kButtonTextStyle = TextStyle(
  fontSize: 30.0,
  color: Colors.white,
);

const kConditionTextStyle = TextStyle(
  fontSize: 30.0,
  color: Colors.white,
);

const kTextFieldInputDecoration = InputDecoration(
  filled: true,
  fillColor: Colors.white,
  icon: Icon(
    Icons.location_city,
    color: Colors.white,
  ), //Icon
  hintText: 'Enter City Name',
  hintStyle: TextStyle(
    color: Colors.grey,
  ), //TextStyle
  border: OutlineInputBorder(
    borderRadius: BorderRadius.all(
      Radius.circular(10.0),
    ),
    borderSide: BorderSide.none,
  ),
);
完工。